Flash your lights on a raid
A raid is a good moment for the whole room to react. Home Assistant, the free smart home hub, can start an automation when something calls its webhook address. In this tutorial a raid makes CroStream call it, with the raider's name and the raid size, and your lights switch to a party scene. The same steps work for any service that takes a web request: a bot, a Raspberry Pi, a Discord relay, your own server.
What you'll build
flowchart LR
    R[Raid on Twitch] --> T[Trigger: Raid]
    T --> M[Macro: Raid lights]
    M -- "Send a webhook" --> H[Home Assistant]
H --> L[Lights: party scene]- A destination in CroStream that points at your Home Assistant webhook.
- A macro with a Send a webhook step that posts the raid as JSON.
- A trigger that runs it on every raid.
Time: about 20 minutes. Level: intermediate.
Before you start
- CroStream is logged in to Twitch. See Logging in to Twitch.
- You know triggers and macros, from Your first chat command, and have done Thank and shout out raiders or are happy to make a raid trigger here.
- Home Assistant running on your network, reachable from this PC, with
a scene or light you want to switch. The examples use the address
homeassistant.local:8123; use your own.
Step 1: Add the webhook in Home Assistant
In Home Assistant, create an automation that starts from a Webhook trigger. In YAML it looks like this (see Home Assistant's own documentation for the screen-based way and for your version's exact syntax):
alias: Raid lights
triggers:
  - trigger: webhook
    webhook_id: raid-lights
    allowed_methods:
      - POST
    local_only: true
actions:
  - action: scene.turn_on
    target:
      entity_id: scene.party
raid-lights is the webhook's ID. Home Assistant's address for it is:
The ID is the password
Home Assistant webhooks have no other login: anyone who knows the address
can call it. Use a long, random ID instead of raid-lights, such as one
the Home Assistant editor generates, and keep local_only on so only
devices on your network can use it. The ID is saved in CroStream's
settings file (in the destination's address) and in exports of it, so
don't share those.
Step 2: Add a destination
- In the sidebar, under Automate, click Webhooks, then the Outgoing tab, then New destination.
- Set Name to
Home Assistant. - Set Base URL to the address from step 1.
- Leave Authentication at None: Home Assistant relies on the ID.
- Click Create.
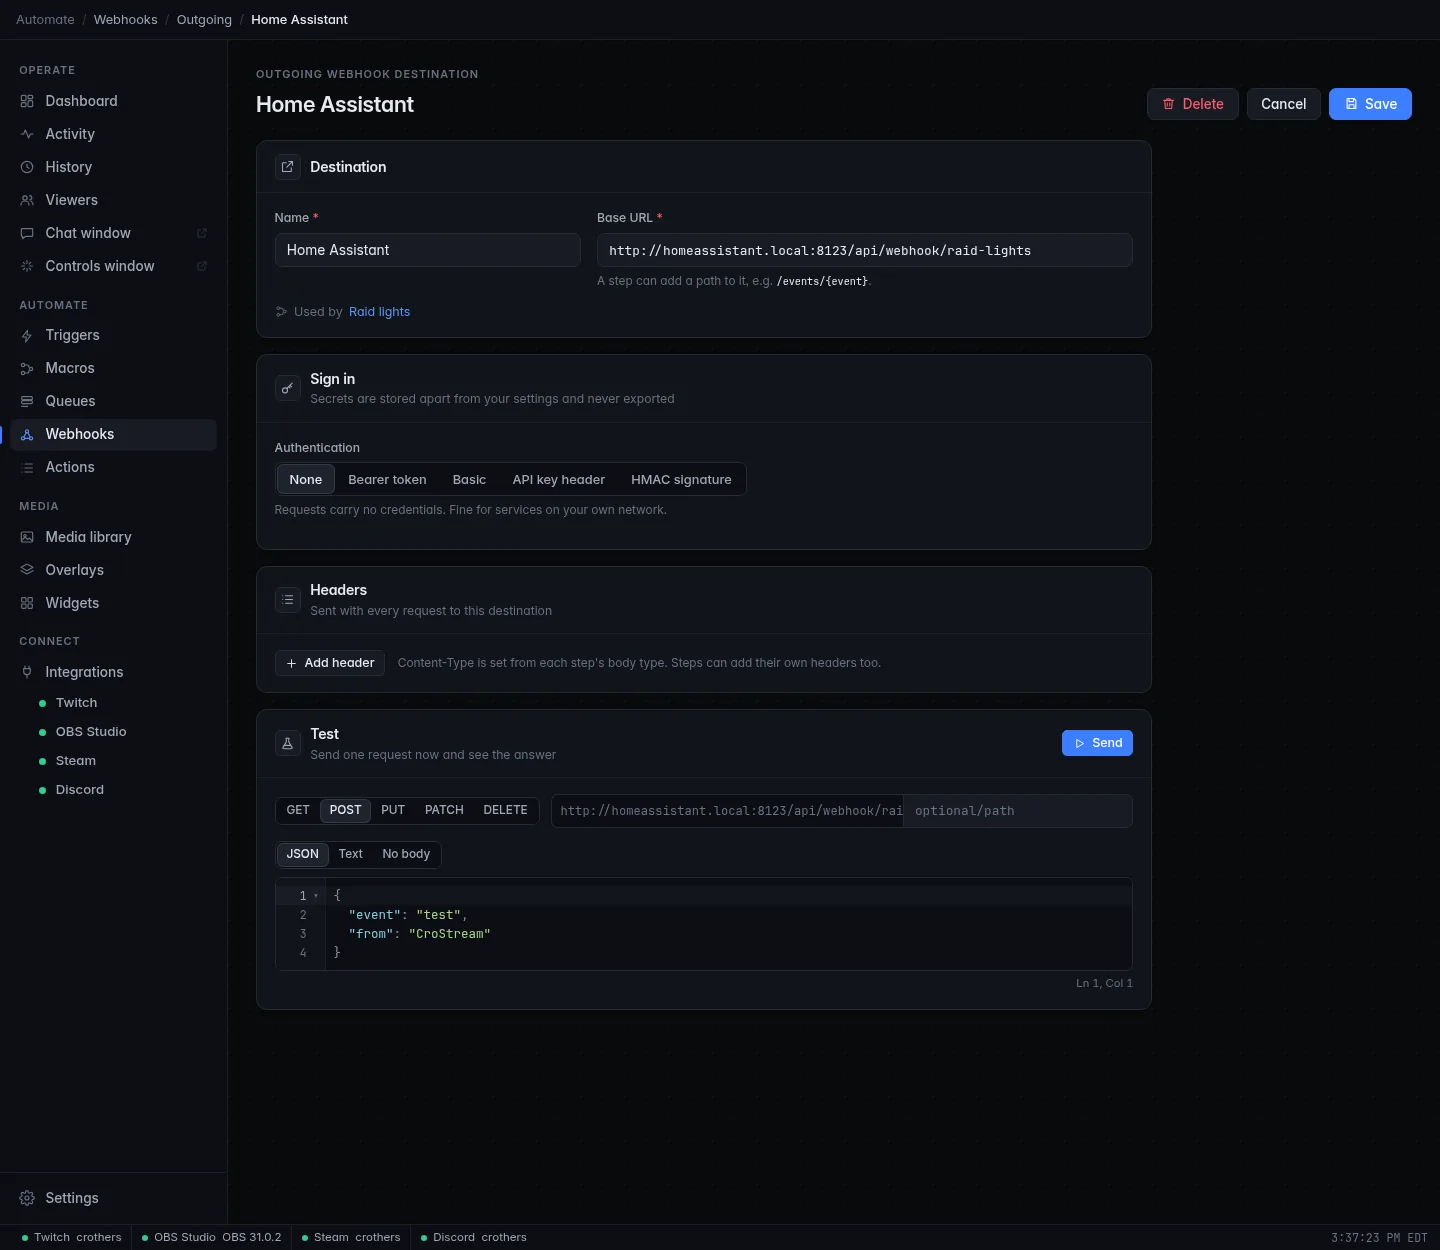
Now try it: in Test, keep POST and JSON, and click Send.
Home Assistant normally answers 200, and your lights change. Anything else is
shown with its status and the start of the answer, such as 404 for a wrong ID.
Step 3: Build the macro
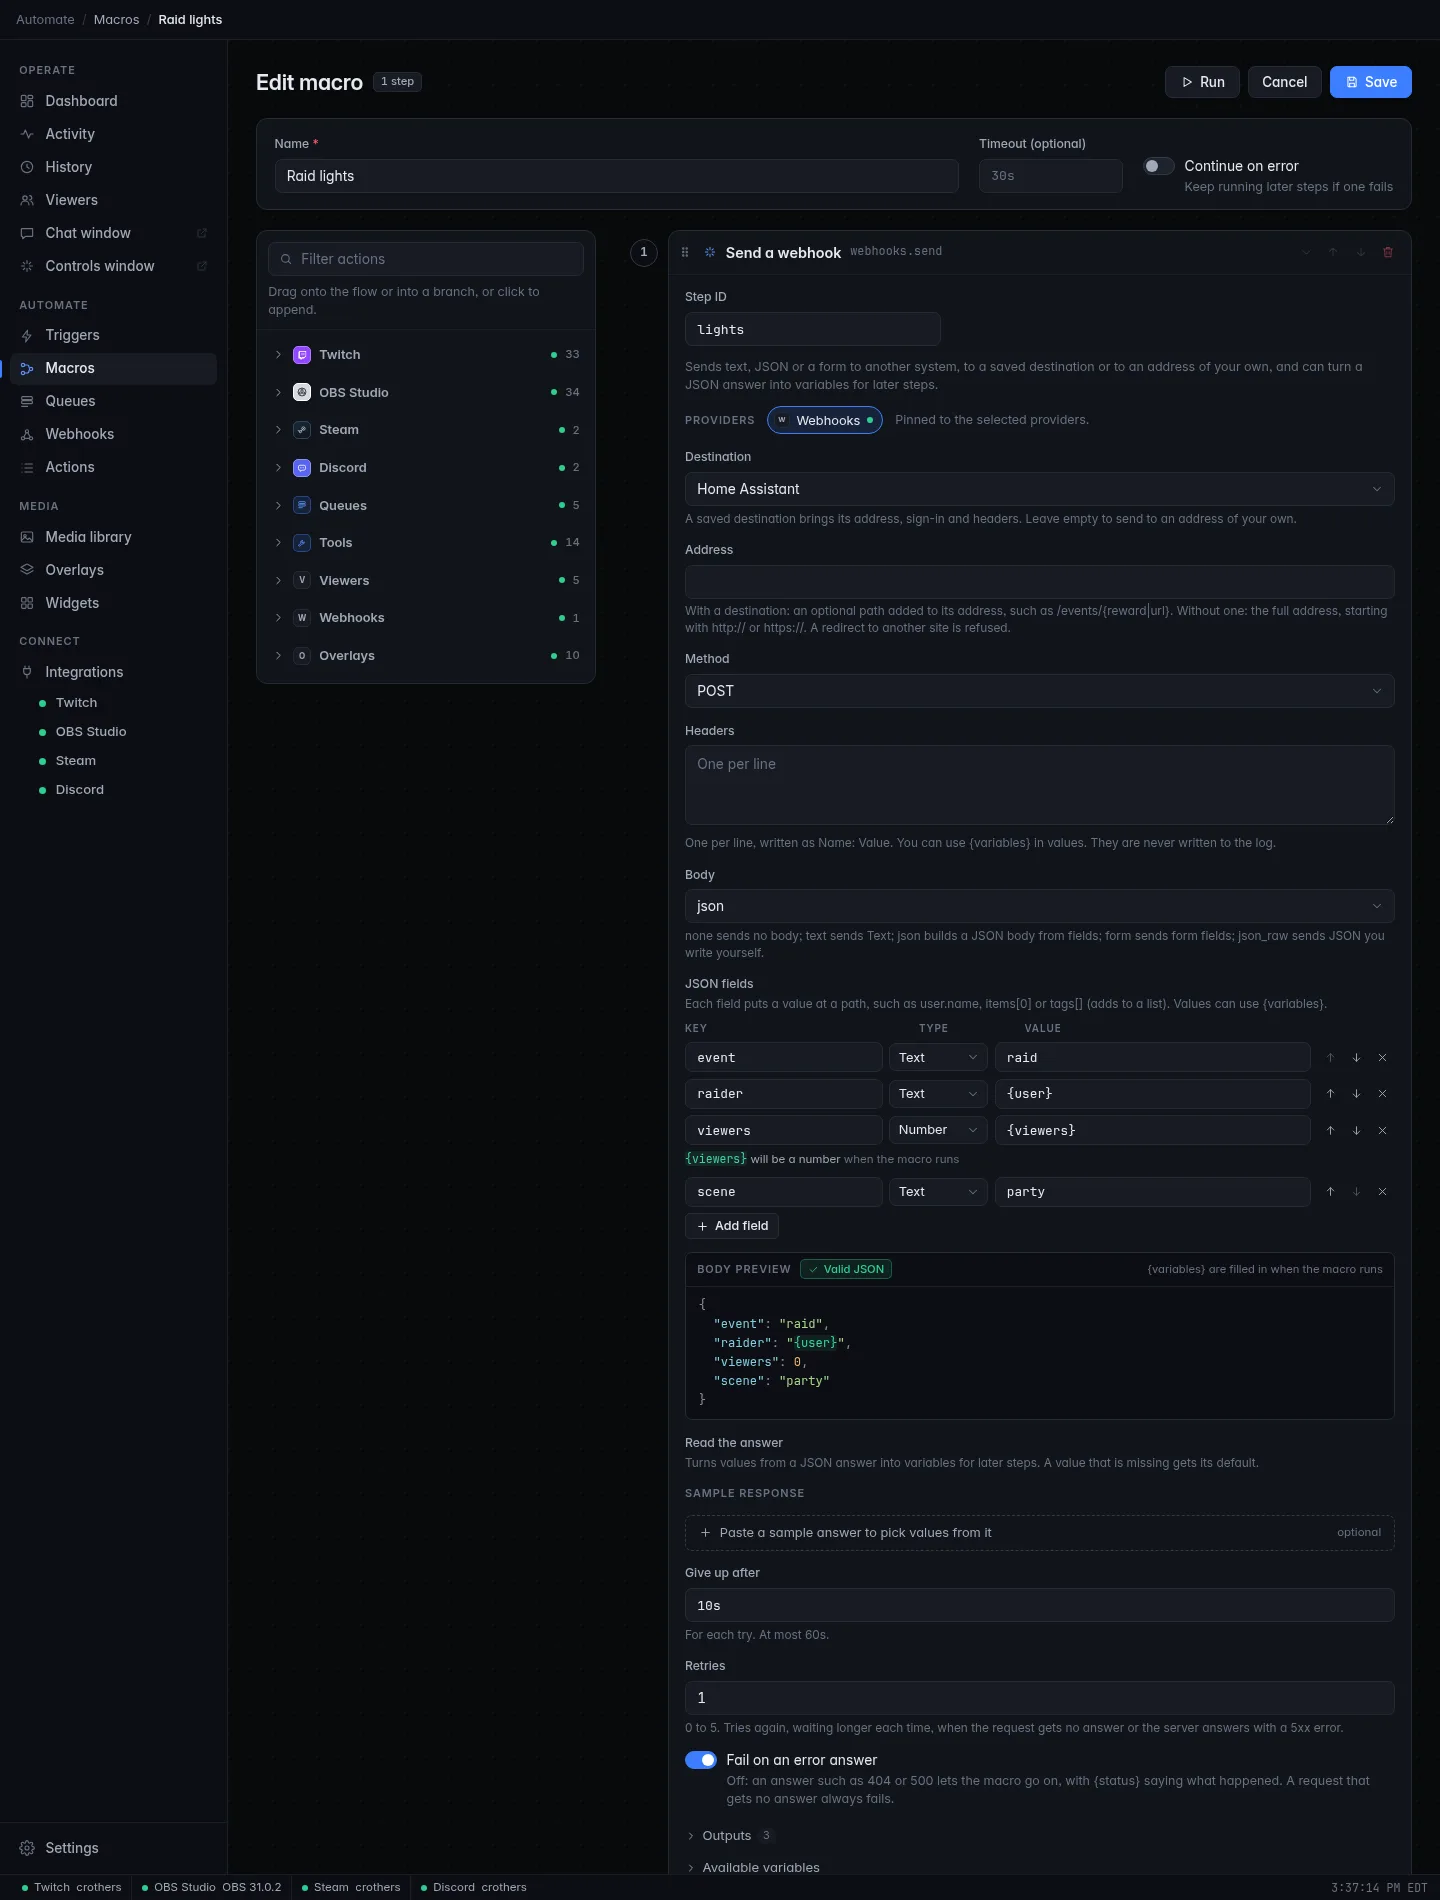
- Click Macros, then New macro. Set Name to
Raid lights. - Filter the palette for
webhookand click Send a webhook. - Set Destination to Home Assistant. Leave Address empty (it would add a path to the destination's address) and Method on POST.
-
Leave Body at
json. Under JSON fields, click Add field four times:Key Type Value eventText raidraiderText {user}viewersNumber {viewers}sceneText party -
Under Body preview, check it says Valid JSON and shows the body:
{"event":"raid","raider":"{user}","viewers":0,"scene":"party"}.{viewers}shows as0for now, because the macro fills it in when it runs, and a note on the field says so. - Set Retries to
1, so one dropped request doesn't miss the moment. - Click Save.
Text values need no care: if the raider's name had a quote in it, CroStream
would escape it. A Number value must hold a number when the macro runs,
which {viewers} always does for a raid.
Step 4: Run it on every raid
- Click Triggers, then New trigger. Set Name to
Raid lights. - Pick Raid as the Event. Set Minimum viewers to
5if you don't want the party for a raid of two. - Pick the Raid lights macro and click Save.
Your other raid trigger (a thank-you, say) still fires too: every trigger whose event matches runs, independently.
Check it works
- Open the Raid lights trigger and click Test. It runs with a sample raid.
- The lights switch to your party scene.
- Open Activity. The macro's run shows the step with something like
POST homeassistant.local:8123: 200. Only the host appears, never the address's path or the body. - Home Assistant's own Logbook shows the automation ran.
Troubleshooting
| What you see | What to do |
|---|---|
| The step fails with answered 404 Not Found | The webhook ID is wrong, or the automation is off. Open the destination, check the Base URL, and use Test. |
| request to … failed | CroStream can't reach Home Assistant: the name doesn't resolve (try its IP address), it's down, or a firewall is in the way. |
| the JSON is not valid or a Number error | A field's type doesn't fit its value. The step's Body preview and the field's note say which. |
| It works with Test but not on a real raid | Check the trigger is Enabled and its Minimum viewers. Activity shows whether it fired. |
| The lights don't change, but the step succeeded | The call arrived. Check the automation's conditions in Home Assistant. |
Next steps
- Use the answer. Many services reply with JSON, and Read the answer turns values from it into variables for the next step. See Webhooks.
- Send to a service that needs a token or a signature: add it to the destination's Sign in. It's stored apart from your settings.
- Have Home Assistant call CroStream as well: an incoming webhook set to Local networks only, as in Webhooks.
- The other direction: Thank Ko-fi donors in chat.